Approvals by email have a predictable failure mode. Someone requests something, the request gets forwarded to whoever might approve it, one reply is lost, and three weeks later nobody can say whether it was approved or simply forgotten. The audit trail is a mailbox.
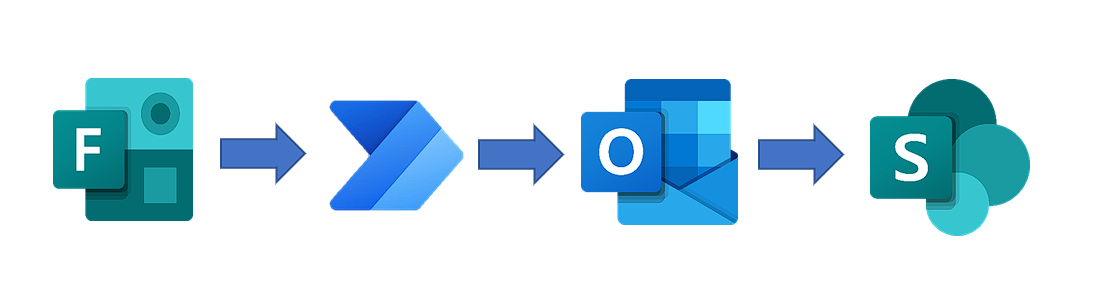
This is the no-code rebuild I did in 2022: a Microsoft Form on the front, a SharePoint list as the database, and a Power Automate flow doing the routing and notification.
What the flow does
Requestor fills the form
        ↓
Approval request emailed to approver
        ↓
Approver approves or rejects (inside Teams / Outlook / email)
        ↓
Outcome recorded in a SharePoint list   ← the audit trail
        ↓
Requestor receives the status by email
Four pieces, no server, no code:
| Layer | Component | Role |
|---|---|---|
| Input | Microsoft Forms | Structured request, validated at source |
| Storage | SharePoint list | The record — one row per request |
| Orchestration | Power Automate | Approval routing, branching, notifications |
| Delivery | Outlook / Teams approvals | The approve/reject action itself |
The important architectural point: the form is not the record. Forms collects submissions into its own response store, which nobody queries and nobody audits. The SharePoint list is the system of record, and that is what makes the workflow defensible later.
Step 1 — The form
Create the form from the Power Automate portal (New → Form), not from Forms directly, so it lands in a place the flow can reference without hunting later. Questions become the request payload — every field you want to audit needs to be a question, because anything you leave out of the form has to be typed by hand afterwards.
Step 2 — The SharePoint list
SharePoint → New → List → Blank list. Then add one column per form field, with the data type matching the data:
- text fields → Single line of text
- dates → Date and time
- yes/no → Choice
- requestor identity → Person, so it resolves to a real account and not a free-text string
Getting the types right at this stage is the difference between a list you can filter and report on later, and a list that is just a spreadsheet with extra steps.
Step 3 — Create the flow from the approval template
Power Automate → Create → search the approval templates → pick the one for a form submission. Before continuing, every connection must show as connected. A template that creates the flow with a broken connection produces a flow that saves cleanly and fails on the first run, which is a particularly annoying way to find out.
The template wires up most of the shape:
- Trigger: when a new form response is submitted
- Select the form
- Start and wait for an approval — with the message the requestor sends to the approver
- Add a row to the SharePoint list, mapping each form answer to its column
- Resolve the approver’s identity with Get my profile (V2)
- Send an email to the requestor with the outcome
- Save with a descriptive flow name
The Get my profile (V2) step is the non-obvious one. The approval action returns a decision and a responder, but the email you want to send is addressed to the requestor — so the flow has to resolve an address from an identity rather than reuse whatever came back in the approval response. Getting this step wrong produces a flow that approves correctly and silently emails nobody.
Step 4 — Test both branches
Test the approve path and the reject path separately. They are different code paths in the flow and only one of them is exercised if you test once.
| Test | Expected |
|---|---|
| Submit, approver approves | Requestor gets an approved email; row appears in SharePoint |
| Submit, approver rejects | Requestor gets a rejected email; row does not appear |
That second row is where the design shows its flaw.
The decision I would reverse
Only approved requests are written to the list.
At the time this felt like housekeeping — why record something that was denied? But it means the system of record contains only successes. Which means it cannot answer the questions people actually ask later:
- How many requests were rejected last quarter, and for what reason?
- Did this person request something before, and was it denied?
- Are rejections clustered on one approver, one cost centre, one type of request?
None of those are answerable from a table that only stores approvals. And the more subtle cost: a rejection leaves no trace at all, so “we never received your request” and “we rejected your request” look identical to the person asking.
The fix is small and it is worth doing on day one: write the row on both branches, with a Status column holding the outcome, plus the approver and a decision timestamp. Adding it later means back-filling a table that has no data for the period you care about.
The other thing I would change
Build it as a solution, not a personal flow.
A flow created in someone’s personal Power Automate workspace is owned by that person. When they move teams or their account is deprovisioned, the flow stops — quietly, on the next request. For anything that is genuinely an organisational process, it should live in a solution with a service account as the connection owner, so it belongs to the department rather than to whoever happened to build it on a Tuesday.
Two smaller ones, from the same family of “this will outlive you”:
- Handle the timeout branch. An approval that is never answered is a request that silently dies. Power Automate approvals expire — the flow needs an explicit branch for that case that notifies someone, rather than leaving the request in limbo.
- Do not renumber columns by hand. Column mapping is manual in the template, and it is the part that breaks silently when someone reorders the list schema. Remap and re-test after any schema change.
Why this shape is still worth knowing
No-code approval routing is one of the few places where the low-code tool genuinely beats a custom build. The alternative is an approval table, a state machine, an email template, and a scheduler — a few days of work that will never get maintained, versus an afternoon of configuration that a non-developer can edit.
The constraint is that you have to design the record carefully even though the routing is free. The routing is the visible part and the record is the part that matters in eighteen months, and the template makes the routing easy while saying nothing about the record.
The repository with the full step-by-step screenshots is at blackhairrr/Microsft-365-Automate. The Google Workspace equivalent is a companion piece — the same four layers, assembled from very different parts.
Leave a Comment / Ask a Question
Have thoughts or questions on this article? Drop a message below and Faiez will receive an instant notification.